
 Video Game Blog
June 11, 2019
Okay Boys and Girls! Story time (with pictures!)... ...I know you other tankers will appreciate that!
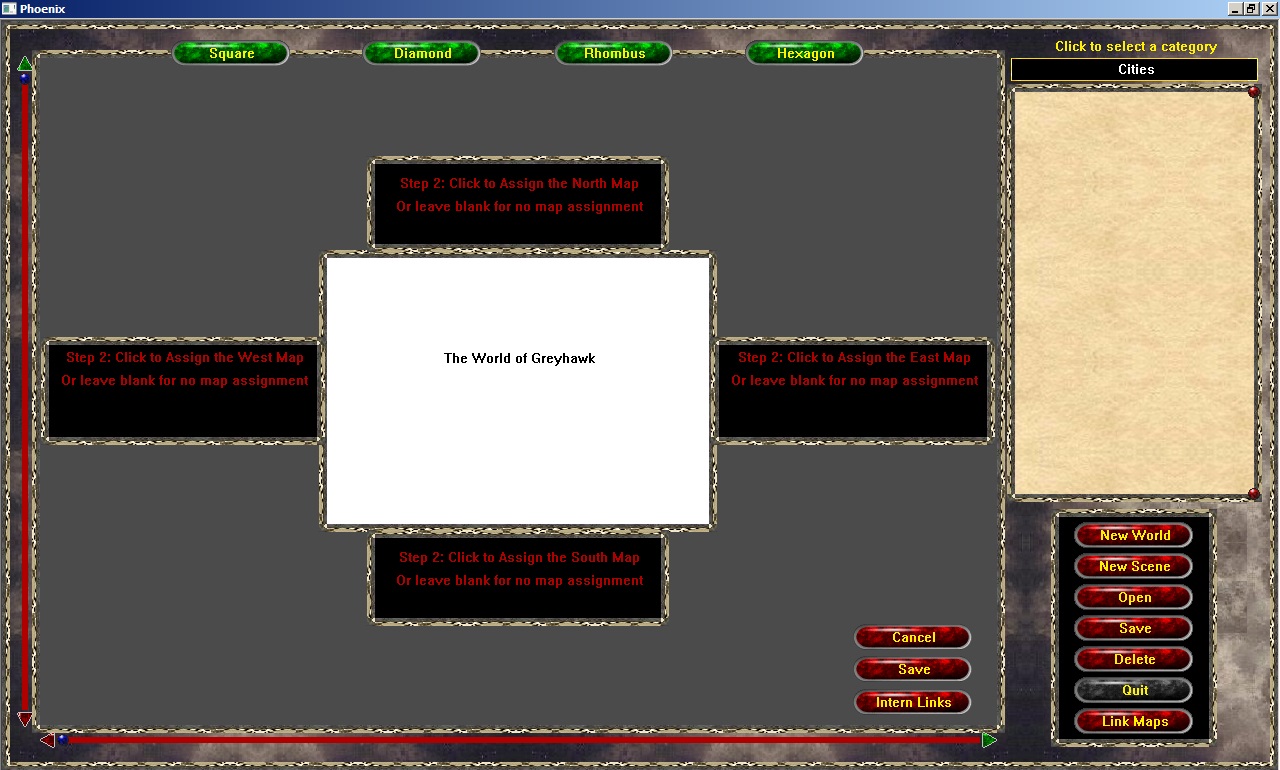
I got MOST of the way through setting up the Map Linker. In the following series
of screen shots you will see the steps:
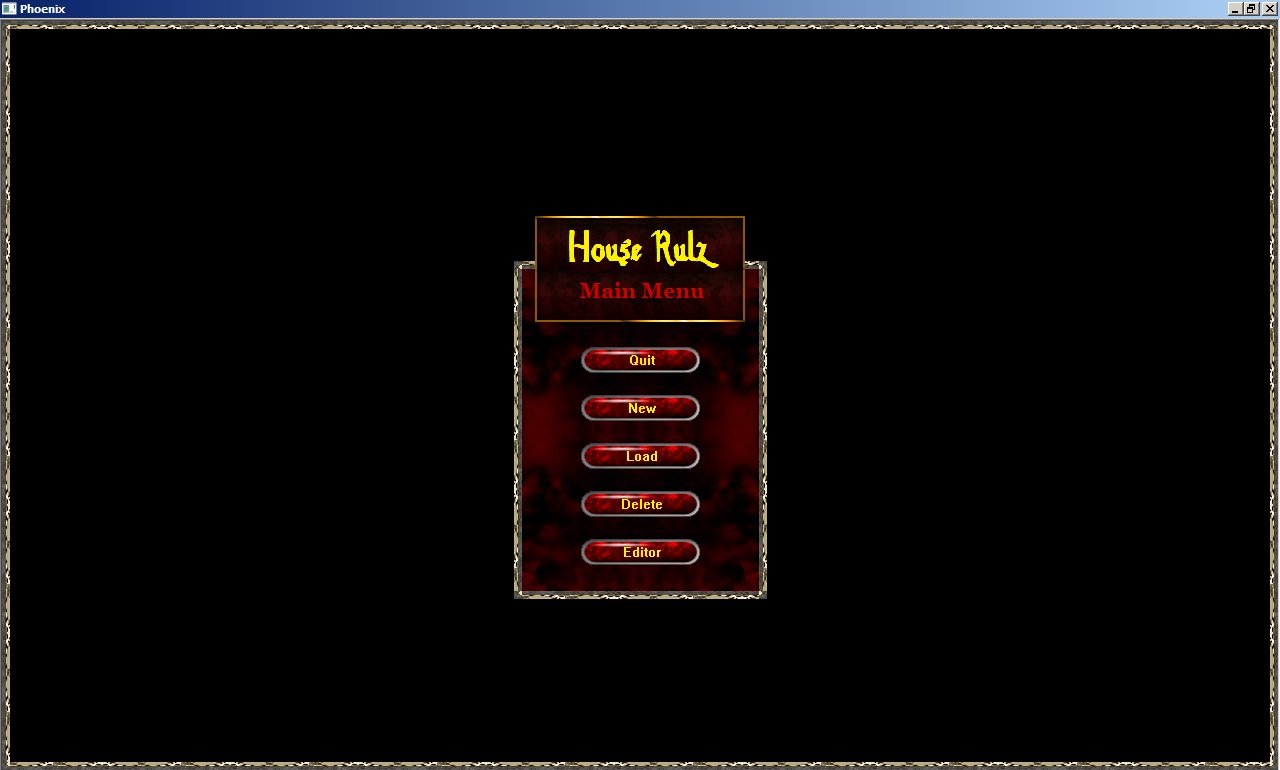
1: Starting Menu Screen
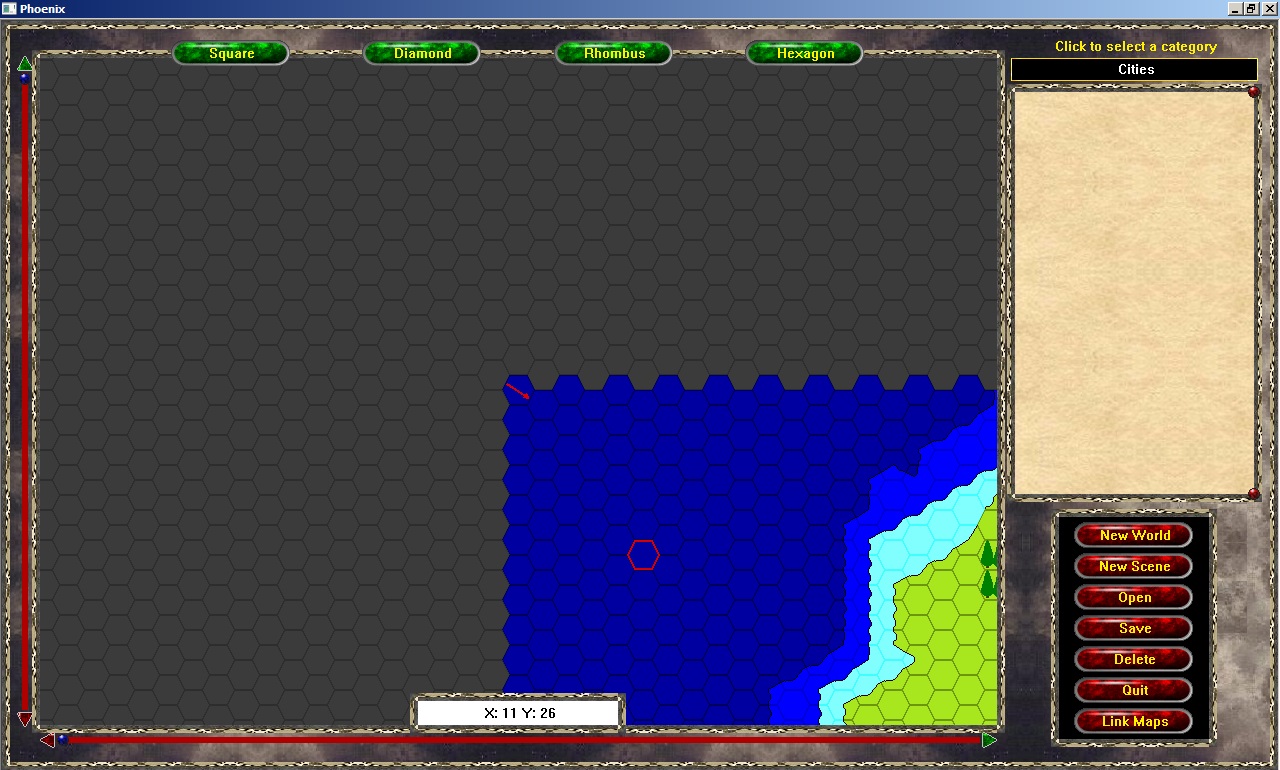
2: Map Editor (after clicking button)
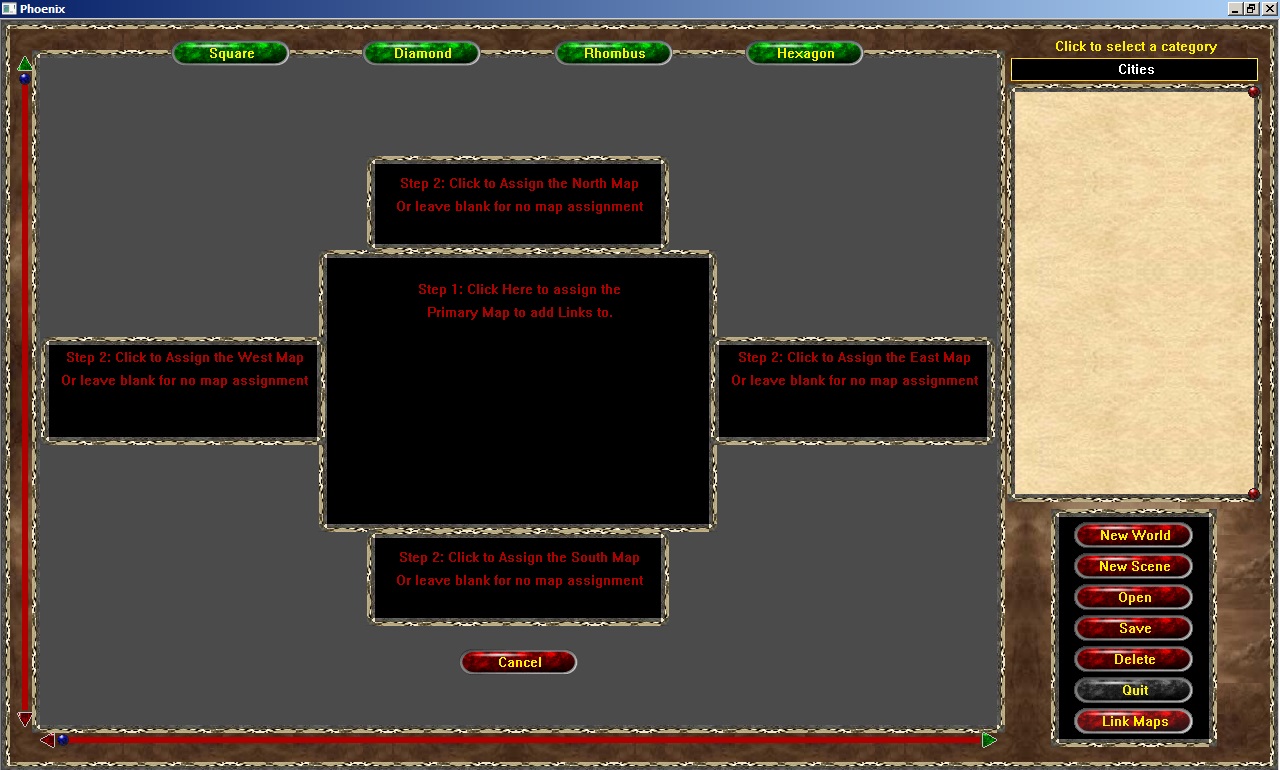
3: Map Linker Main Page (after clicking "Link Maps")
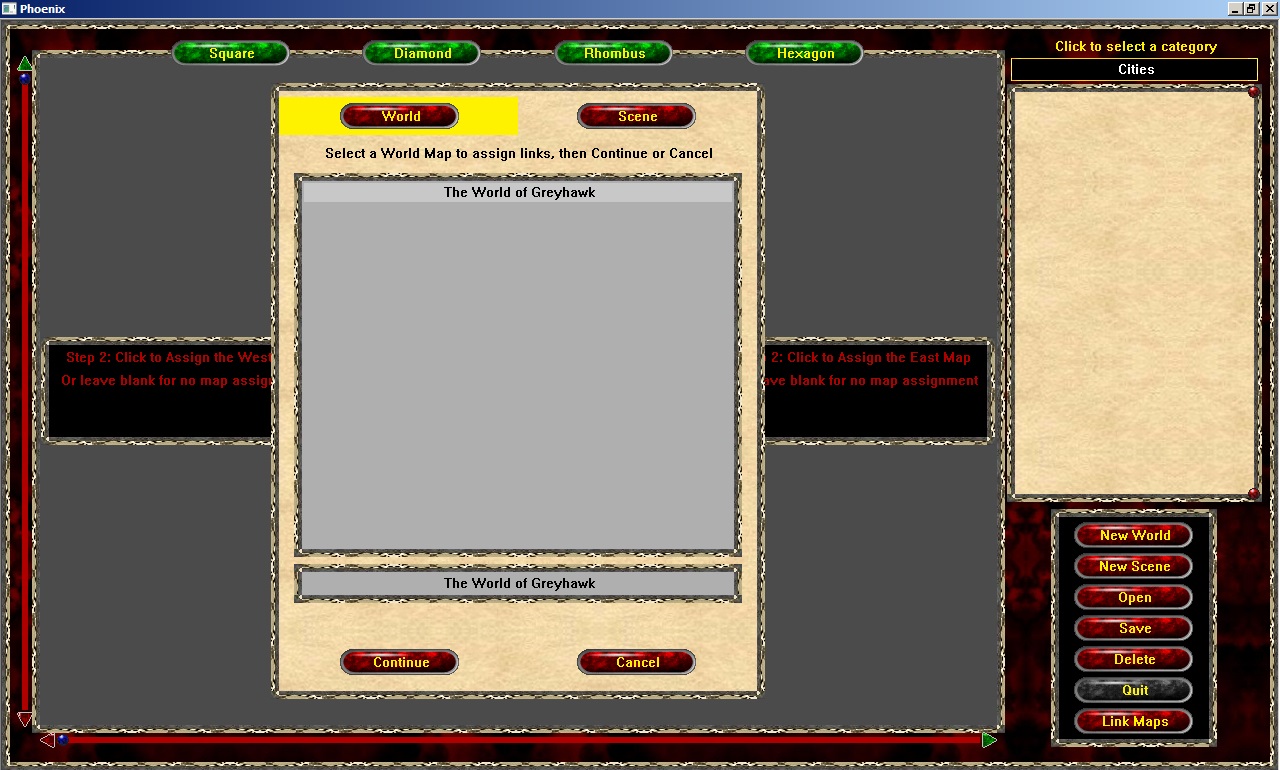
4: Selecting a Map File to edit (after clicking center rectangle)
5: Back to Map Linker Page after picking map
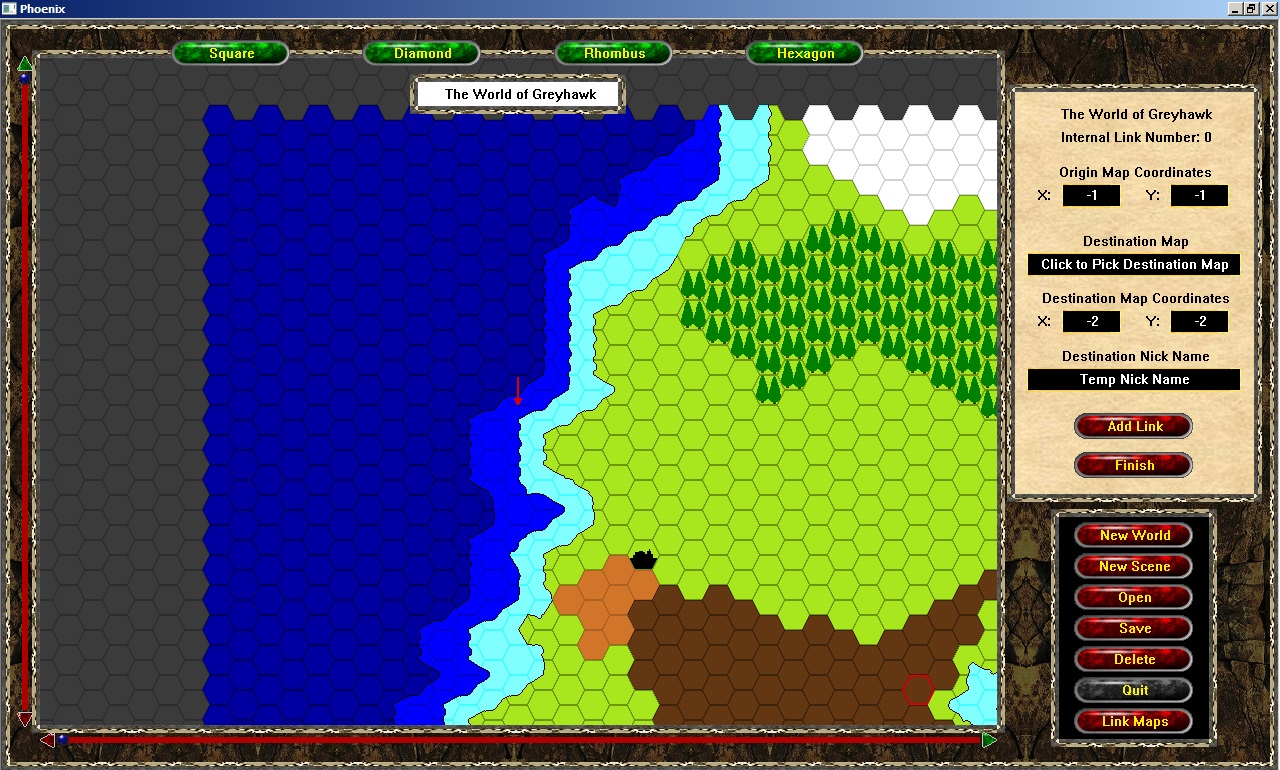
6: The Internal Link Page assigning links to the non-edge locations
The "Add Link" and "Finish" buttons on the right are partially programmed.
A person at this point is suppose to manuever themselves to within visual range of where the point of "exit" will be, and then click the specific spot on the map. The coordinates will automatically get assigned to the "Origin Map Coordinates" and get displayed showing that they're there.
Once they do that, another list of maps will appear asking the User which map the Destination Map is. This of course is just a couple clicks. Destination map will then load, and again, the User manuevers to the desired location and clicks on the specific Tile.
After assigning the coordinates, a pop-up dialog will open asking the User to give the location a Nick Name for easy reference later. Once that is assigned, the person is to click the Add button.
They do this process until they're done.